How you create your artwork for animation is completely up to you as long as you follow some simple guidelines as stated below. The main thing is to be able to have any animatable elements on their own layer and to always think about scale.
Elements to Create
Begin by making a detailed check-list of all the elements you need to draw for your animation. Go through the script and storyboard writing down what is needed to tell the story. Be economical, think if you can re-use elements from previous scenes by making simple changes e.g. flipping the image, altering the colours.The main elements will include:
Characters
Props
Animated Background Characters or Elements (e.g. clouds, birds)
Static Backgrounds
Traditional Method
If you are more confident drawing by hand or just prefer the style for your animation, then get out your favourite art materials. Use paints, old photos, magazine cuttings, crayon etc.Once you've created your artwork, scan it into the computer at a high resolution (300dpi) or take straight on photographs using a decent camera. You will then load the image into photoshop and prepare as needed.
Characters
For characters we need to be able to separate moveable parts in Adobe Photoshop and the below example is the best way of approaching this. The characters below have been drawn so all the elements are separate and can be layered together. This is similar to how you would create a 2D character for stop-motion too.
Backgrounds
As with the characters, backgrounds can be created by any method including drawing, painting, collage or even just a photograph. The main thing you will have to consider is the ratio you need to work and the scale of objects compared to your character.
The backgrounds can be a flat image or a made up of a series of layers allowing flexibility of layout and easy recycling of artwork.
Ratios
Ratios
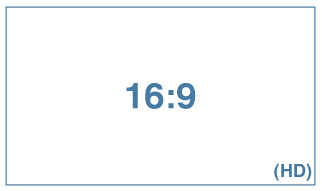
Lets talk about ratios and getting it right for animation. By ratio I am referring to the resoultion of the animation we are creating. For example we will be working at 1080p, which is considered Full HD, and has the resolution of 1920×1080 pixels.
 1920x1080 pixels has a ratio of 16:9 widescreen.
When working by hand, it is best to mark out faint 16:9 guidelines on your page. If we break the ratio down, 16 divide by 9 = 1.777, so the width of the rectangle is roughly 1.8 times the height. Therefore you would draw a rectangle that is 180cm x 100cm or 90cm x 50cm etc.
Simply put: the width of the background is 1.8 times the hight.
When creating an image directly in Photoshop, you will need to set the canvas size to 1920x1080 under File & New.
Creating a Background for Panning
You may wish to create panning shots where the camera moves across a wider or taller scene or where a character would walk on the spot and the background would move behind them (see below).
Preparing a Character in Photoshop
A number of programmes are available to allow to create a character and other artworks ready for animation. In class we will be using Adobe Photoshop which is an industry standard programme. For other alternative programes, see the post entitled Software & Tools.
Within Adobe Photoshop you need to work with layers to build up your character. Each movable or replaceable part is to be drawn/designed on a separate layer and named.


No comments:
Post a Comment